
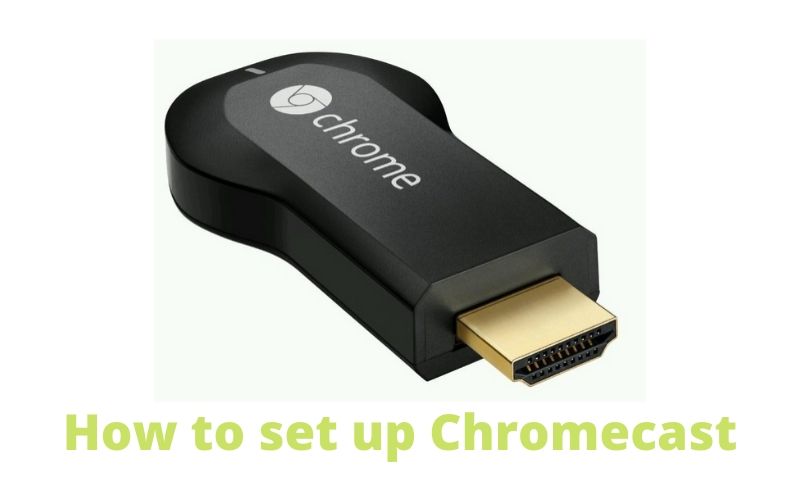
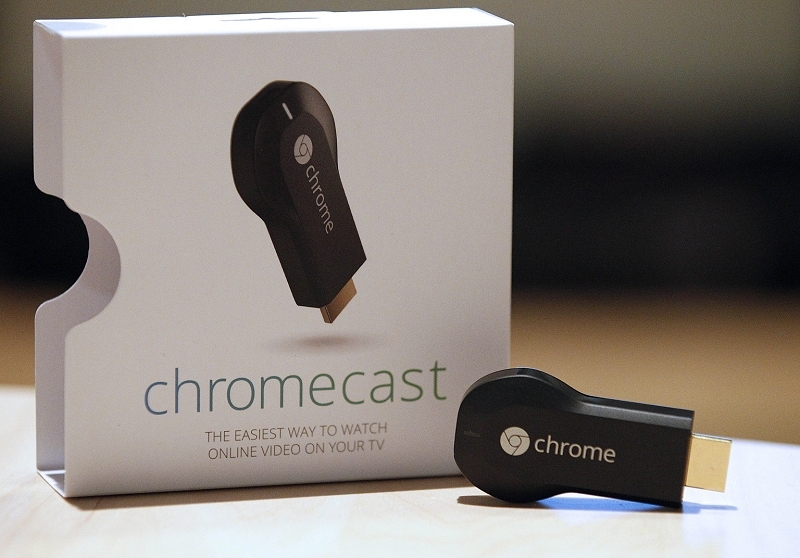
Launching Google Chromecast is very easy. But in case the process does not seem intuitive to the user, the developers placed a connection diagram on the back of the packaging lid. The main connector of the gadget is HDMI. We find the corresponding landing slot and stick to it. In this article, you can know how to setup Chromecast.
Note: if the TV has several HDMI outputs, be sure to remember the number to which you connected Chromecast.


Now it’s time to connect the power. There are two ways to do this:
If your TV has USB ports, connect to one of them using the supplied Micro-USB adapter. By connecting in this way, we get rid of excess wires going to outlets;
If you can’t connect to USB, then through the adapter that is included in the kit, you can power directly into a wall outlet.
From this moment, everything is ready for the first launch. As soon as you turn on the TV and select the HDMI channel into which the device is inserted, a picture will immediately appear informing that Chrome is running, and you can proceed with the setup.
How to setup Chromecast: Initial setup
The huge advantage of Chromecast is that it can work with almost all the most common operating systems:
- IOs;
- Android
- Mac OS
- Windows
The main condition is that the Chrome browser is installed.
At the first start, you will need to download an application suitable for your OS from the Google website, or a plug-in for Chrome. The website address with the corresponding software will be indicated on the screen, or it can be viewed inside the box. After all these simple manipulations, you can proceed to the initial setup.
The first priority is to make your gadget and Chromecast see each other. To do this, make sure that you have Wi-Fi turned on. First, Chromecast behaves like an access point. The program you downloaded will make an overview of the available networks. And among them will show you everything related to the Chromecasts. What if you have several of them. Choose the one you need and click connect.
A four-digit identification code appears on the TV screen. Enter it into your device. So we connected these two devices. This is additional protection against mistakenly not connecting to the neighboring Khromkast or, on the contrary, so that he could not play a trick on you by seizing control from you in the same way.
After you log in, the most important installation step begins:
You need to bind the miracle device to the same network where the devices that you will manage are located. The same program will show you all the available networks to which you can connect.
Here, if desired, you can change the name of the Khromkast itself.
From the moment the gadgets are on the same network, you can connect to the Internet and start browsing the available functionality or immediately watch videos from the Internet.
The undoubted advantage is that for the operation of the device, it is not necessary to constantly keep the computer or smartphone turned on. Just a stable connection directly to the Wi-Fi access point is enough, and then the other sources will no longer be needed.
Note: Chromecast only works in the 2.4 GHz band. If the access point to which you try to connect it works at 5 GHz, it simply will not see it. Treat this nuance with attention.
If you need to configure it again, you need to reset the settings. Press the button next to the USB port on it and hold until the indicator blinks. This procedure takes about 25 seconds, no less.
Interfaces and management
If there is no need to broadcast data from existing devices, then you can immediately start viewing content from the Internet.
At our disposal immediately will be:
- YouTube
- Google+
- Netflix
- Google Play Movies;
- Deezer Music
- Google Play Music;
- JustDanceNow;
The list of resources is constantly expanding. Instead of the remote control, the device from which the Chromecast was connected and configured was used.
In order to broadcast data from a computer or phone, you must install Google Cast – this is a browser plugin. After installing it, a button will appear in the upper right corner, clicking on which will begin duplication on the TV screen of everything that happens on the sending computer or smartphone.
A lot of software has already been released for Chromecast that extends its functionality. An overview of these applications can be found on the official page from Google.
Additional interface settings
A nice bonus will be the ability to customize pictures, photos, or videos displayed in the background. If you leave the default settings, then you will be shown just beautiful images: nature, reviews of world museums, works of art, cities, and even weather information.
But you can customize the selection so that photos from the personal collection are also displayed on the screen.
How to connect and configure the Google Chromecast 2 media player?

Google’s Chromecast media player can turn any TV into a device for streaming multimedia content in minutes. Another great advantage: such a player costs about 3,000 rubles. In a wireless home network, playback is controlled via a PC, smartphone, or tablet using the Google Home application for Android or iOS. Next, we’ll show you how to install and configure Chromecast 2.
The device starts up quickly and easily. After connecting Chromecast to a free HDMI-connector of the TV, you need to decide on the issue of power. If the TV is equipped with a USB port, the supplied USB cable is required. If not, use the power plug, also provided. Turn on the TV and switch to the HDMI input to which Chromecast is connected. Now you will see a splash screen with a welcome media player.
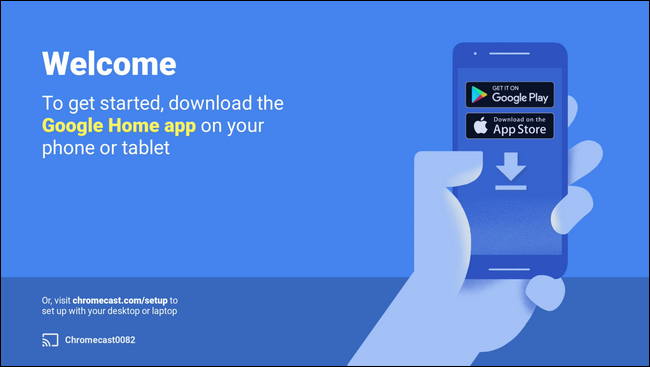
Before you turn your TV into a Smart TV device, set it up with the free Google Home app. On your mobile device, open a browser, enter the URL chromecast.com/setup, click on the banner to go to the corresponding application store. You can also immediately open the Google Play or Apple store, find the corresponding Google Home program in them and install it on your smartphone or tablet.
After installing the mobile application, go to the Wi-Fi settings of your smartphone or tablet and connect to the “Chromecast” wireless network with the following number – in our example, this is Chromecast7852.
Set up the Chromecast pairing
Launch the application and accept the terms of use. The program then searches for Chromecast adapters that are awaiting configuration. This may take a few seconds. After the software makes contact with the adapter, the message “Chromecast found” appears on display. Confirm that the device found is correct by pressing the “Continue” button.
Sign in to Chromecast
In the “Chromecast setup” dialog box, you will receive a four-digit code with the message “Do you see this code on the screen of the TV device?”. Look at the TV and make sure that the set of numbers and letters issued by the program matches the one displayed on the TV screen. If so, click “Yes” and set the device name. We left the name “Chromecast7852.” If you wish, activate the guest mode and click the Continue button.
Connect Chromecast to a wireless network
The next step is to select the wireless network through which Chromecast establishes a connection to the Internet. Select the desired network, enter the password for your Wi-Fi network, and click “Continue” so that the application establishes a connection to the Internet.
As soon as Chromecast can access the WAN, it will notify you with a message stating that the connection was successful. After that, the streaming content reproducer will be able to download and run some updates. Then, you may need to restart the media player.
An icon with three dots (in the upper right corner of the screen) allows you to call up the settings menu and correct some parameters that we set when we first set up the device, such as turning on the guest mode, choosing another Wi-Fi network or changing the name of the media player.
Chromecast Streaming
Install any Chromecast-enabled UPnP application on your mobile device. After that, you don’t have to do anything else but access the Wi-Fi media server, select movies or TV shows, start playing them and redirect the stream using the Chromecast button or choose the visualization tools for the streaming content playback device.
If you have a Plex Media server installed on your PC or NAS server, you can stream movies and TV shows through Chromecast directly from the Plex mobile app. To do this, open the Plex program on your smartphone or tablet, click on the streaming icon in the upper right corner of the main menu, and in the dialog box that appears, select the just configured Chromecast receiver. Then start the series or movie: the selected video using Chromecast appears on the screen of your TV.
Google Chromecast 2 Test Results
The Google Chromecast 2 media player may not be impressive in its equipment and appearance, although the bright colors definitely catch the eye, the filling in it is very good, as well as the price. The built-in Wi-Fi module, with support for the 2.4 and 5 GHz bands, as well as the 802.11ac standard, ensures minimal delays in transmitting media content over the air. And a removable HDMI cable is a great find that extends the life of a media player.
Google Chromecast 2: Alternative
Amazon Fire TV Stick costs 4000 rubles more, but in addition to countless streaming functions, it also has a built-in application store through which you can download additional programs and games. When working with the device, you can choose to use either the application for a smartphone or the included remote control with voice control. Last but not least, Amazon Fire TV Stick plugs into the HDMI port, which means it consumes less power.
Extend TV functionality with Chromecast

Unfortunately, this does not apply to Smart TVs. The reason is that manufacturers completely block access to the software used. In addition, often, with each new model line, they build a separate ecosystem. With it, you will be able to broadcast music, videos, games from a laptop, tablet, or smartphone to a TV without laying any cable.
To connect the laptop, you need Chromecast and the free Google Cast extension for the Chrome browser. Connect Chromecast to your wireless network (instructions at support.google.com/chromecast ). When you open the Chrome browser with the Google Cast extension, in the upper right corner, you will see the “Full-Screen Mode” button.
And
After clicking on this button, the computer’s desktop will be displayed on the TV screen. You can use any programs, for example. Full projection of the screen of a mobile device onto a TV is possible only with some Android smartphones, for example, with models of the Nexus line, and for this, you just need to use the “Cast Screen” element in the Chromecast application.
The application also has a function such as “Backdrop” (splash screen). In this case, you change the background displayed by Chromecast. So, a complete overview of Chromecast features is available at google.com/chrome/devices/Chromecast. There, for example. You will be able to find applications of popular video streaming services. As well as music libraries and music services.
Conclusion
Although the Chromecast cannot be called a full-fledged representative of video players, users will definitely like it because of its compactness—ease of connection, configuration, and ease of use.
Any user located on the same home network with Chromecast can easily connect to it and start showing everyone their photos and videos. And it is precisely this functionality. That may turn out to be the most popular both for fans to gather with a company of friends and serious businessmen at presentations.


